Showing posts with label quick tips. Show all posts

Saturday, September 21, 2013

How to Create Custom Google Chrome Shortcuts - Launching Extensions & Browser Actions

In the age of Information explosion and internet era, web browsers are not only for browsing web pages but also for doing something beyond our expectations. Most prominent example we can point out for such a browser is Google Chrome, based on open-source Chromium project, which the Silicon Valley technology giant owns. Without considering the software or platform you use, Shortcut keys are truly worthy, especially for those who love quicker and productive techy life.

In that sense, I hope that you will love to know about how you can create your own Google Chrome shortcuts and hence making usage like never before.


Create Custom Google Chrome Shortcuts

Here, I am going to make use of some in-built abilities of Google Chrome as well as some powerful extensions. First, I will set up custom keyboard shortcuts for specific extensions using in-built feature of Google Chrome. I also hope that this tutorial will help you in replacing hard-to-use Google Chrome shortcuts by easier ones at instance.

Google Chrome Shortcuts for Launching Extensions

As mentioned earlier, Google Chrome has a pre-built feature for assigning keyboard shortcuts for each browser extensions you have installed. Albeit the fact that it is a less-known feature, it is a truly productive one. When compared to the latter option, involving a third-party extension, the process of assigning keyboard shortcut is an easy job. You just have to follow steps mentioned below.

Step One

Launch Google Chrome browser and navigate to the extension manager section. You may make use of either of following methods.
  • Click on ‘Options button’, right to address bar -> Tools -> Extensions and it will lead you to the Extension Manager
  • Type ‘chrome://extensions’ in your address bar and hit Enter
    Google Chrome Extension Manager 

Step Two

There, you can see information about each Google chrome extension you have installed, along with highlighting effect for active ones. There are various options for enabling/disabling extensions, deleting and managing options and permissions. However, you have to scroll down and find out the option ‘Keyboard Shortcut and click on it.
Google Extension Manager: Create Shortcuts for Apps

Step Three

Instantly, you can see a pop-up window like shown in the following image. Size of the pop-up box may change according to the number of extensions, you have installed.

Keyboard Shortcuts Pop Up
As you can see in the image, there are no shortcuts set for extensions. Now, you can start assigning shortcuts for each extension, shown there.

Step Four

For assigning Google Chrome shortcuts for each extension, you have to click on the corresponding filed of that section. Once you have clicked, the background of the field will turn red along with one message ‘Type a shortcut’, just like in following image.

Typing Shortcut Extension Manager

Step Five

Now, you have to enter the shortcut, by pressing which you want to open the extension later. For instance, we have assigned the shortcut ‘Ctrl+Shift+W’ for WebRank SEO extension.


Type Shortcut Key Extension

However, you should try to not to give the in-built shortcuts of Google Chrome (like Ctrl+T, Ctrl+W) in those sections in order to avoid the clash. Once you have given all the details correctly, you may click on ‘OK’ button, which will close the pop-up window.

Yes! You have successfully assigned Google Chrome shortcuts for your favourite extensions.

Google Chrome Shortcuts for Various Browser Actions

Even though the former method can help you in activating extensions instantly, Google Chrome does not have an option for controlling browser actions. Therefore, I have to make use of an extension for doing the job neatly. You just have to keep track on following steps to assign Google chrome shortcuts for browser actions.

Step One

First, as I said earlier, you have to install one extension in your Google Chrome browser. You can download this FREE extension, Shortcut Manager, from Chrome Web Store.

Shortcut Manager Extension Installation Step One

Step Two

After installation, taking not more than some seconds, you can see a button, like shown below, near to the address bar of Chrome.


Shortcut Manager Extension Installed

When you click on it, you can see a message like shown below. From the dialogue box, select option ‘See all settings / Add new shortcuts’, which will lead you to another page, the options page of the extension.

Step Three

The options dashboard of Shortcut manager will be like in the following image, consisting of various sections. From the right top section, click on ‘Add a new shortcut’

Shortcut Manager Extension Installed Add New Shortcut


On the right section, you can see multiple columns with different labels. On the first column, named Shortcut key’ you have to type the shortcut. For doing that, click on filed and enter the shortcut keys combination. As you cannot use the backspace for correcting short key, you will have to hit the Clear button for erasing the shortcut key you have entered. In case, if you click the backspace button, it will be also included in the shortcut combination.
Shortcut Manager Save Shortcut

Step Four

In the below section, you can see a field named Action, where you have to define the browser action according to your desire. There are two options available in this section.

1. Browser Action

Here, you have a list of browser actions to choose from. List includes opening new tab, opening tab in new window, moving tabs, webpage navigation, scrolling, screen capture, navigate to downloads, open nth tab, take screenshots etc. In case if you have selected option to open favourite URL, you should give the URL next to the field.

Shortcut Key Working Extension Browser Actions

2. Execute JavaScript

You can assign one shortcut for executing a specific JavaScript. You have to select the latter option and then give the JavaScript file URL or the script itself in corresponding fields.
Shortcut Key Working Extension Enter Shortcut Key

Step Five

You have an option for restraining effects of specific Google Chrome shortcuts in some sites, even though all pages will have effect of shortcuts according to the default setting. If you want to restrict so, you should give URL’s in the section called ‘URL Patterns’

URL Patterns Shortcut Manager

Final Step

If you have given all things correct and accordingly, you can now go back to the top section of page and click ‘Save’. After the re-launching of Google Chrome, the extension will be working fine as usual.

Shortcut Manager Save Shortcut


In addition, you have options for restricting or disabling some Google Chrome shortcuts in sometime. You shall go to the options page, select the corresponding shortcut from list and hit ‘Disable’ to remove its effect from Google Chrome immediately.

Conclusion

Here, I have shown you some options for assigning custom Google Chrome shortcuts for browser actions as well as for launching extensions. Hope both of these methods will be useful for your quicker techy life. Do you know any other methods for assigning Google Chrome shortcuts? Do let us know via comments.

Thursday, May 30, 2013

Internet Security: How to implement Hardware and Software Firewall

There are two kinds of firewalls: software and hardware firewalls. Although both provide similar benefits, a hardware firewall is more efficient and cost effective when you want to protect more than one computer. Firewalls are essential to implementing efficient Internet Security.

What is it?

A hardware firewall is a device that is placed between an Internet connection and a network. Computers connect to the Internet via the network. But all data coming in will first be checked by the firewall.  A firewall has the ability to check data entering into a computer through an Internet connection. If the source of the data is not reputable, the firewall will prevent it from being downloaded. A firewall also has the ability to identify and block inbound scans that hackers use to exploit security holes within a network. 


Using a Hardware Firewall for Internet Security

When setting up a hardware firewall, it is important that it is configured properly. If not properly configured, the firewall will block all types of connections or it may not work at all. A hardware firewall can be configured to block certain types of applications. A firewall is also useful in situations where a computer has already been infected with spyware. Since the firewall can prevent data from being sent into or out of the device, it will block the data being sent by the spyware application. Therefore, it can be used to prevent identity theft. 

How does a firewall work?

A firewall utilizes packet filtering to apply rules within a network. It maintains Internet Security by analyzing packets that are received and sent by the computer that it is protecting. If the packet contains any indications that it may be a threat, it is blocked.  A fairly recent upgrade in regards to firewall technology is known as SPI or Stateful Packet Inspection. SPI allows a firewall to check additional characteristics within a data packet. This feature allows firewalls to work more efficiently. 
How much does it cost?

Implementing Internet Security is not always cheap. However, a moderate investment can lead to an efficient security system. A hardware firewall for a home network system will cost around five thousand rupees. However, for enterprises, the cost will go up as more complex security features become necessary.  Buying a VPN service is another alternative recommended for personal users to secure online activities.

A firewall is considered to be the first line of defense of any efficient security system. Therefore, implementing it within a network is considered to be vital. 

Thursday, October 4, 2012

How to Use Bounce Rate as a Quality Guide

What Is a Bounce Rate?
A bounce occurs when a user visits a website and exits the page from which they came without having moved to another page on the same website.
A higher bounce rate means users leave your website without viewing any additional pages. A lower bounce rate means users stay on your website and have moved to a different page within your website.
Keeping track of your bounce rate is a fantastic quality indicator to determine which pages are working for you. Before you become alarmed, know this: a high bounce rate does not indicate failure! A high bounce rate might be the nature of your website.
Referential vs. Content-Driven Websites
A referential-driven page or website presents information solely for the purpose of providing an authoritative and unbiased resource. Online referential resources may include dictionaries, glossaries, timelines, encyclopedias, etc., and these pages are often static (i.e., they do not require new material to stay fresh). Referential-driven websites typically have higher bounce rates because that's the nature of the website - readers search for the reference material, find the website, and leave.
Content-driven websites must stay fresh and constantly provide relevant material. Examples of content-driven websites include article directories, blogs, and news pages. A higher bounce rate on this type of site may be an indicator of poor quality, irrelevant content, poor navigation, and more.
Expert Authors Should Aim for a Low Bounce Rate
As content providers, Expert Authors who provide high quality content should aim for a low bounce rate (50% or less) and focus on increasing the average time the visitor spends on the site. Unlike referential-driven website providers, content-driven websites want visitors to stay on the website and continue clicking through to different articles or areas of informative content on the website.
Using tools like Google Analytics, gather your pageviews, visitors, visitor duration, and bounce rate. Compare pages and determine why one page may be performing poorly and why one page may be performing well. How was the quality of writing? Navigation issues? Keyword selection? Ads on the page? Length of the article?
To reduce your website's bounce rate and increase the time on the page/site, use the pages that performed well as a template or theme to emulate on other pages while still providing original content. Additionally, try the following strategies:
  • Update your website with quality content frequently
  • Try out features important to your audience
  • Create interactivity (i.e., two-way flow of information between you and your audience)
  • Give your audience a reason to stick around (e.g., resources, quizzes, games, etc.)
  • Routinely check your links to ensure they are working properly
  • Continue driving traffic to your website via quality articles, social media, etc.
Please note: Don't be discouraged by a high bounce rate if visitors stay on the page longer than average (approximately 2 minutes). It could indicate the reader found their information, read the article, and left. However, if a content-driven page is clocking under a minute with a high-bounce rate - let these be key indicators that improvement is needed.
Understanding the dynamics and performance of your website is the key to success. Not only will you be able to target your audience by providing the content they want both in your articles and on your website, you will save yourself from the agony of wondering what is wrong with your website and your articles.
A National Repository on  Maternal Child Health developed my me has a very good average Bounce Rate of 16%.
Questions? Comments? Visit this post online!

Thursday, June 28, 2012

LIS UGC NET Questions and Answers June 2012

1. Roget Thesaurus is Classified manner
2. TCP/IP is a Internet Protocol
3. In AACR2 Part A section 12 deals with Serials Publication.
4. In Key word Indexing Author keyword Index is WADEX
5. Odd one in ANSI, BIS, BSI, ESPN
6. Internet acting as a-.

7. BIOS is a booting software
8. Scale and projections are seen in Geographical Sources
9. Segmentation associated with Information marketing
10. Stop word list used in Automated keyword Indexing
11. Relation between two subject is Phase relation
12. Redundancy in information is Unwanted source should be eliminated \
13. Internet filtering is a internet Censorship
14. Information network for Universities and colleges in UK is JANET
15. Shodhaganga is E-thesis repositories

16. First university started a M Phil program IS Delhi University
17. Head Quters  of ISLIC located at Kolkatta
18. "Minmal, Middling And Maximum theories given by Samuel Rothestein
19. Coden used In Serials
20.Calculation of Impact factor by Web of Knowledge and Scopus
21. Science citation index was published by Thomson Reuters
22. WIPO is Unites Nations organizations
23. Information literacy term coined by P. Zurkonski(1974)
24. Information Power Published By...........
25. Bulletin board Service in Internet is Blog
26. Scalar Chain Means Authority Structure
27. Students influenced by internt here Student is a dependent Variable
28. RFID used in Circulation and Security
29. Brown charging system easy to handle and recordable
30. Information explosion and cost makes resource sharing.
31. Square bracet []used in AACR2 for other external sources
32. Vidyanidhi is a Institutional repository
33. Xerography also called..Electrophotography
34. Solomon Four group design is Pretest posttest control group design
35. Blair and Moron model for Stairs project
36. Ideographic hypothesis means Individual
37. Who has published the book entitled " Information Power: Building Partnership for Learning"?
     American Association of School Librarians[AASL]
38. Heart  and Soul of Indian Constitution?
      Right to Constitutional Remedies
39. Inference Engine is available in?
      Expert System
40. The protocol used to transfer file from one system to anther system is? 
       File Tansfer Protocol(FTP)
41. In 1974, Zurkowski has given which term?
      Information Literacy
42. For what purpose, Solomon Four Group Design is used?
      Quantitative Analysis i.e. data analysis


Tuesday, December 13, 2011

Schemer – Google’s New Creation to Search for Activities!

Google has recently launched Schemer, a new service which allows users to add and discover activities based on their location. For instance if I want to learn how to play a guitar then I can create a scheme on my schemer profile about it. My circle of friends from Google+ and services tied to the site can recommend me a guitar shop or a class, where I could learn how to play it. My friends and others (if the activity is publicly shared) can even comment on my scheme with helpful tips.


Once someone signs up with Schemer, that user can also view a host of activities planned by their friends on Google+. You might be able to tick off things you have done among them.

Local and Social


I guess the idea behind Schemer is to help people discover new activities they want to do. For instance if I was visiting a particular city, I might be served up city specific activities which I could find interesting. Schemer is also neatly wrapped with Google+, adding another reason to get on Google’s social network.

Google might also be trying to create something like Foursquare, which is also a location based social network. With Schemer, Google might also be able to aggregate local data for its search results, which it is not exactly really good at currently. At some stage we can probably expect Schemer to be integrated with Google+ profiles and relevant Mobile apps.

Facebook has recently bought Gowalla, another location-based social network. That would make it a competitor to Google’s Schemer somewhere down the line.
Currently Schemer is in beta stage on invite only basis. To get into the queue visit their website and add your email id for getting an invite.

Thursday, November 24, 2011

Google Kills many products including Google Wave and Knol


Google has announced that it in the process of shutting a number of products including Google Wave and Knol.

Find below the list products/services which are going to be closed by Google.

Ø  Google Bookmarks Lists
Ø  Google Friend Connect
Ø  Google Gears
Ø  Google Search Timeline
Ø  Google Wave
Ø  Knol


 Google Bookmarks Lists is the experimental feature for sharing bookmarks and collaborating with friends. It will be closed on December 19, 2011.
Google Gears will be stopped on December 1, 2011. Instead of Google Gear, Google is going to focus on HTML5 for implementing offline browsing capabilities.


Google Wave   will be turned off completely on April 3, 2012. Wave users can export the individual wave to pdf files.


Google Friend Connect (GFC) allows webmasters to add social features to their sites by embedding a few snippets of code. It will be retired on March 1, 2012. Google recommends using Google+ badge instead of this retiring service.


 Knol will work as usual until April 30, 2012, and the knol authors can download  their knols to a file and/or migrate them to WordPress.com


 . 

Google recommends the Knol users to use
 Annotum.org, which is powered by WordPress and was built in collaboration with Solvitor and Crowd Favorite for moving the knol content.


We have lot of
 knols and Knol Collections including a knol about Anil Mishra  which is getting around 200 page views every week without doing any promotion.


Wednesday, October 5, 2011

Useful Google Plus Tips and Tricks | Google+ Tips and Tutorials


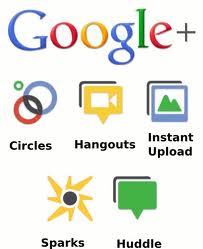
Google+
This post contains some useful Google Plus tips and tricks or some useful Google+ Tutorials. Google Plus is now become the most growing social network and gains huge users in the short period of time while in the beta mode. A truth about this blog is that we have included some articles about facebook tips and tricks and found targeted visitors from major search engines but after lanuch Google Plus beta mode we have included Google Plus tips and tricks in this blog and look the major effect that my visitors from search engines increased as a rocket speed so this live experience shows users are searching more and more about Google Plus tips and tutorials in these days. 
The main thing on social networking sites is the privacy of their users which is easier in Google Plus to set what you want to show or hide of your data to the web. Facebook did many changes in their privacy setting and launch video chat with skype after launch Google Plus beta mode because if facebook don't take any action then for sure Google Plus reach to the top level with easiest ways but there is no doubt facebook is struggling to stand against Google Plus. By the way check out some most useful Google Plus tips and tricks listed below.


1.   Basic Definitions of Google Plus Features as Circles, Hangout, Sparks

Before starting about Google Plus Tutorials lets start with what is Google Plus Project and some basic definitions of its features. Just follow

What Is Google+?

Google+ is a tool you can use to organize your online contacts. You can upload your pictures and videos to share with friends, join in on a group video chat to plan your next outing, or just hang out!


  • +Circles
Enable you to organize contacts into groups for sharing across various Google products and services. Although other users can view the list of people in your collection of circles, they cannot view the names of those circles. Organization is done through a drag-and-drop interface.


To understand Google Plus and Circles better, go to the Settings Gear and select Profile and Privacy. Look for "See how your profile looks to other users." Type in a user name from different circles and click Preview to see what your profile looks like from the specified user.


  • +Sparks

A front-end to Google Search, enabling users to identify topics they might be interested in sharing with others. “Featured interests” Sparks are also available, based on topics others globally are finding interesting.

Sparks is a great way to find information to help in your professional development towards building your e-capability, all information is current and reliable.

  • +Hangouts

Used to facilitate group video chat (with a maximum of 10 people participating in a single Hangout at any point of time). However, anyone on the web could potentially join the 'Hangout' if they happen to possess the unique URL of the Hangout.


  • +Huddle

Huddle is a a group messaging feature available within the Google+ mobile app. Rather than sending text messages to each person in a circle the user sends Huddle messages to the group. This can be advantageous when trying to setup where and when to go out.

  • Google+ Mobile


Accessing Google+ on one’s Mobile Phone or Device (Currently Android and Web Only)

Download the Google+ mobile application from the Android Market. Once you launch the application it will ask which account you wish to sign in with, select the account.


  • Enable Push Notifications

Google+ mobile app -- Launch Google+ on your phone, press the menu button and go to Settings. Enable or Disable notification/vibration/ringtone for Google+ and Huddle notifications.

Google+ (plus.google.com) -- Click the ‘Options’ cog in the top right hand corner of the screen and select ‘Google+ Settings’. Under ‘Set delivery preferences’, add your mobile number and choose Push Notifications or SMS Notifications. Then in the ‘Receive Notifications’ section, choose which notifications you would like to receive by selecting the checkbox in the phone column for each item.


Getting Started with Google+

Tips

Google+ can be accessed from http://google.com/+ or http://plus.google.com or http://google.com/plus or, for mobile device, from http://m.google.com/plus.

To share Google+ posts click the “Time link” button and use the Google Shortener Extension for Chrome browser and share posts to Blogger, Tumblr, Facebook and others.


Creative ways to use Circles


Create an “*Inbox” circle and include the people you’d like to see every post from. The friends, family, and acquaintances circles are on top by default.

Create a "Read later" circle and include no other person (Google+ calls it an empty circle). When you see a post you want to read later, share it only with the "Read later" circle. Then when you have some time, open that circle and read through (and delete) the saved posts.

Similarly, create an (empty) "Drafts" circle. When you have an idea for a post, but no time to write it, draft a rough version and share it to the "Drafts" circle. Edit the draft by using "Edit this post" from the drop down menu. Then, when the post is complete, copy it to a new post that you can then share to your circles and delete the draft post.

Yet again, create a similar (empty) circle called “Bookmarks” so you can go back and find that tidbit of information to read and use again and again.

If you would like to mute future notifications on a particular post you can do so by opening notifications, then opening the particular notification you wish to mute. Look at the bottom right hand corner of the notifications box. There will be an option to mute that notification.


Formatting

Google+ uses the follow character operations to perform italicizing, bolding, or striking through text:


_ italic text _ ➜ italic text
* bold text * ➜ bold text
- strikethrough text - ➜ strikethrough text
_*italic bold text*_ ➜ italic bold text


Formatting symbols only work when the formatted string is encapsulated by spaces, therefore surrounding the symbols by parentheses or brackets escapes the formatting.


[_ italic text _] ➜ [italic text]
** bold text ** ➜ *bold text*
_()(*- strikethrough text -*)()_ ➜ ()(*-strikethrough text-*)()
foo_*italic bold text*_bar ➜ foo_*italic bold text*_bar
**cough** ➜ *cough*


Shortcuts


Note: These shortcuts apply to the desktop version of Google+ only.

@Anil Mishra or +Anil Mishra ➜  (press @ or + to link to a person in a post or comment) but they must be a google plus member for this to work otherwise the hyperlink of their name just turns into plain text.

After you post, click the little drop-down arrow (▽) in the upper right of the post to disable comments or disable re-sharing (i.e., for things you don't want to spread beyond your specified audience).

Press “q” to go directly to the chat box

Press , then after writing a comment on a post to quickly submit it. (faster than clicking the Post Comment button every time)

Press twice and then to cancel writing a comment.

Press space to drop down a page. (Applies to all web pages)

Press +space to move up a page. (Applies to all web pages)

If you want to post directly to specific friends, just type the first letter of their name, a drop-down list will appear, keep typing until you see their name, then select the name and click to send message or begin chat. Alternative quick step, if necessary, click to remove existing “addressees” (i.e. Public, Circles, etc) so that the post is addressed to no one. The in the message area using the + or @ technique described above, start typing their name until you see it, select it, and it will then be included in the message as well as the addressees.

While moving through posts using ‘j’ (next post) and ‘k’ (previous post), you can start     a comment by pressing .

Use the mouse scroll wheel to navigate through photo slideshows


Privacy

A core element of Google+ is its privacy features, which have been integrated deeply into the product. Google+ gives users extensive control over these features.

Click edit in your profile to change which circles can view what personal details. Your name, gender, and profile picture have to be public, everything else can be restricted. You can also opt out of appearing in the search results here.

If you would like to send a message to another user, just put their name into the destination field of your posting. If the recipient is not a user of Google+, enter their email address. To save typing the email address every time, you can add them as a contact on the circles page.

If you want the permanent link to a post, click on its timestamp to see the single post. You can copy the URL from your browser to share the permalink (alternatively, you can select “Link to this post” from the drop-down menu at the top left of the post)

You can link directly to your profile using http://profiles.google.com/.

There are also non-official shorteners that use the profile number you can find when viewing your profile. (For example go to http://gplus.to/)

To understand Google Plus and Circles better, go to the settings gear to Settings -> Profile and Privacy. Look for "See how your profile looks to other users." Type in a user name from different circles and you will be able to see how your info is shared according to those circles.

There is a shortcut for this under the EDIT PROFILE button on a user’s profile page. It’s a greyed-out “View profile as....” box. Click on each section to see how each person or circle will view each area: About, Posts, Photos, Videos, +1s, Buzz


1.   Google+ Tips for Send/Receive Tweets in Google Plus

If you want to twitter integration as sending tweets and showing your twitter updates into your Google Plus account then you can easily integrate your Google Plus account with twitter. you don't need to leave your Google Plus account for sending tweets or showing your updates of your twitter account. Just follow Send/Receive Tweets or Show Twitter Stream in Google Plus.


2.   Google+ Tutorials for send/receive facebook updates in Google Plus

Now after twitter integration you can integrate your facebook account in your Google Plus account. You don't need to leave your Google Plus account if you want to post any update in your facebook or you want to see your facebook stream updates. Just follow Show Facebook Stream and Updates Facebook Wall from Google Plus. 


3.   Google Plus Tips for Bold/Strikethrough and Italic Text

 Different text formatting are always eye catching for your friends and for your customers so get noticed to some words for making it bold/italic or strikethrough. Just follow Make text to Bold/Italic/Strikethrough in Google Plus.


4.   Google Plus Tips and Tricks for Sending Private Messages

Did you find any option for sending private message to your Google Plus friends? No. Ok some tips is required for sending private messages in Google Plus to your friends. If some one send you private message then you will got these messages into your main stream page and the message will be seen only by you. So just follow Sending Private Messages to Friends in Google Plus.


5.   Google Plus Tricks To Get Google Plus Notification Updates on Mobile Phone

Do you want notification if some added you to in circle or if some one write comments on your updates or anything what you check options to getting notification on your mobile phone. Just follow Google Plus Updates Notification on Mobile Phones. 


6.   Google Plus Wall Status Updates By Mobile Phones via SMS

Now if you are an Indian users then you can send Google Plus updates via SMS from your mobile phones and also you can send updates to individual circles. Hope this features will be launch word wide soon! So for Indian users just follow Get Google Plus Updates from Mobile via SMS Text.


7.   Google Plus Tips for Adding Google+ Widget To Blogs

Are you a webmaster? Have you any blog? If your answer is yes, then by adding Google+ widget to your websites or blogs you can increase your Google Plus connections so for adding Google+ widget for your blogs just follow Adding Google+ Widget To Blogs. 


8.   Google+ Tutorials:Sharing your wall updates to directly facebook, Twitter, LinkedIn, Tumblr

You can now share your Google Plus wall updates directly to facebook, twitter, linkedin and tumblr. Your each updates will contain a button of "Share on..." and if you click on then you will see option to share. This is all have done by a chrome extension so you have to use chrome browser if you want this option. Now if you are on chrome browser and want to enable this feature then just follow Share Google Plus Wall Updates To Facebook/Twitter.


9. Downloading Google+ data as friends contact, albums, videos to desktop

If you want to secure your Google Plus data as your albums, your uploaded videos or your friends contact, your stream data and your profile data to your desktop hard drive before being hacked by some one. Just follow Download All Google Plus Data To Desktop Hard Drive.


10.    Google Plus Tips To Move Facebook Album Photos To Google Plus

Have you many photos in your many albums and want all photos in your Google Plus Profile. It is very difficult to save all photos to your desktop and then upload these to your Google Plus Profile. A Chrome Extension is there for easily move your facebook photos to your Google Plus account with some clicks. You have to be on chrome browser if you want to move your facebook albums to Google Plus by just simple clicks. Just follow Move Facebook Photos To Google Plus Account.


These Google Plus Tips and Tricks are regularly updated so get back after some days to this post you will see some more Google Plus Tutorials. If you want to get updates on Google Plus then you can get noticed by bookmark this page,
 Add me in your Circle on Google Plus and you can Be My Fan on Facebook and follow us on Twitter or simply get updates directly to your email address just verify your email address with us for SubscribeMy News Later.

Recommend this

Related Posts Plugin for WordPress, Blogger...