Showing posts with label anilkmishra. Show all posts

Sunday, September 22, 2013

How to Cite YouTube and other Sources [Video]

Any time an idea is borrowed from a source—like a newspaper article, a YouTube video, a tweet, or a class lecture—that source needs to be cited. But that’s not all. The way citations are written is also important. Not only are there different citation formats to follow, like APA or MLA, but the citation of different source types, whether a blog post or a speech or a photograph, also vary, even if just slightly, e.g. capitalization. In this video, English instructor Renee Swensen explains citation styles and documentation, essential knowledge for any writer to have in order to avoid plagiarism.

Watch the video:


How to Cite YouTube & Other Sources from Turnitin on Vimeo.


READ ALONG…
Citation Styles and Documentation: Avoid plagiarism by learning how to cite YouTube, Facebook, Twitter and scholarly journals


MLA, APA, CMS, CSE etc.  If you have heard of these before, you have likely been asked to write a paper using them.  What do these acronyms stand for?

Let’s talk about your different courses for a moment.  You might have an English class, a psychology class, or a history class.  Different courses are housed under different fields of study and different fields have different groups who meet to decide how scholarly writing in that field should be presented.

For example, English falls under the Modern Language Association, psychology falls under the American Psychological Association.  These associations have manuals that explain how papers should be written in those disciplines.

CMS is called Chicago Manual of Style, which a history course might call for or CSE for Biology and other science courses.

The trick with these documentation styles is realizing you don’t have to memorize the style, you simply need to follow the guidelines, and use these guidelines as a reference.  That means you might need to look this information up each time your write an academic paper.

Guidelines will specify how the paper should be laid out, such as spacing, margins, headers, page numbers, etc.  It will also detail how to document any outside sources you used in the paper, such as in-text citations, footnotes, works cited pages or reference pages.

Knowing how to lay out the paper according to the documentation style is one thing, but knowing how to cite sources is quite another, and usually the most challenging for students.

Let’s walk through a practice source and look at how to break that source down to determine what kind of citation I need.  We’ll use APA as an example.

The first thing you need to do when looking at a source, especially one you accessed online, is determine what type of source it is.

This source gives you some clues.  It is a double-sided page, has an abstract or summary, a list of references, the title of the source, the main source may even have “journal of…” or looks like it has a specific audience of scholars.  This is definitely an academic journal.  You need to be able to differentiate between a journal, article in an online newspaper or a blog.

In order to cite the source correctly, you need to look up the type of source in a reference manual, so you can see what information is required in the citation.  These manuals often contain model citations for you to follow.

For a journal article I need to be able to match the information in the citation example with the information for my particular source.

A citation for a journal article looks like this:

Author. (year of publication). Title of article. Title of Academic Journal. Volume (Issue), pages.

Author’s last name and initials, the year it was published, the title of the articles (not in capital letters), the title of the academic journal italicized, the volume number, the issue number in parentheses, and the page numbers.  Luckily, I don’t have to memorize all this, just match my source with this sample.

Mishra, A.

The author of the article is Mishra, A. The year, (2013).  The title is cloud computing for library resources and services.  The journal title isJournal of Library, Information and Communication Technology, the volume is 5 and the issue is (1-2), with the page numbers 1-9.

An MLA citation for this journal would have some differences, such as capitalized titles, quotation marks, etc., so you need to reference up your required documentation style to get it right.

Now you have to remember that if you borrowed any ideas from a source, like a YouTube video you watched, Twitter, Facebook or a class lecture, you have to cite that source in your paper.

How to cite YouTube

APA style:

Author, A. A. [Screen name]. (year, month day). Title of video [Video file]. Retrieved from http://xxxxxxxxx

MLA style:

Last name, First name. OR Username. “Title of Video.” Title of Site. Name of institution or publisher, Day Month Year of publication. Medium. Day Month Year of access.

Just remember that you need to take the time to get your citations right to avoid plagiarism.

See how to cite other common sources, including: An interview; speeches and lectures, a painting, sculpture or photograph; films or movies; sound recordings

Saturday, September 21, 2013

How to Create Custom Google Chrome Shortcuts - Launching Extensions & Browser Actions

In the age of Information explosion and internet era, web browsers are not only for browsing web pages but also for doing something beyond our expectations. Most prominent example we can point out for such a browser is Google Chrome, based on open-source Chromium project, which the Silicon Valley technology giant owns. Without considering the software or platform you use, Shortcut keys are truly worthy, especially for those who love quicker and productive techy life.

In that sense, I hope that you will love to know about how you can create your own Google Chrome shortcuts and hence making usage like never before.


Create Custom Google Chrome Shortcuts

Here, I am going to make use of some in-built abilities of Google Chrome as well as some powerful extensions. First, I will set up custom keyboard shortcuts for specific extensions using in-built feature of Google Chrome. I also hope that this tutorial will help you in replacing hard-to-use Google Chrome shortcuts by easier ones at instance.

Google Chrome Shortcuts for Launching Extensions

As mentioned earlier, Google Chrome has a pre-built feature for assigning keyboard shortcuts for each browser extensions you have installed. Albeit the fact that it is a less-known feature, it is a truly productive one. When compared to the latter option, involving a third-party extension, the process of assigning keyboard shortcut is an easy job. You just have to follow steps mentioned below.

Step One

Launch Google Chrome browser and navigate to the extension manager section. You may make use of either of following methods.
  • Click on ‘Options button’, right to address bar -> Tools -> Extensions and it will lead you to the Extension Manager
  • Type ‘chrome://extensions’ in your address bar and hit Enter
    Google Chrome Extension Manager 

Step Two

There, you can see information about each Google chrome extension you have installed, along with highlighting effect for active ones. There are various options for enabling/disabling extensions, deleting and managing options and permissions. However, you have to scroll down and find out the option ‘Keyboard Shortcut and click on it.
Google Extension Manager: Create Shortcuts for Apps

Step Three

Instantly, you can see a pop-up window like shown in the following image. Size of the pop-up box may change according to the number of extensions, you have installed.

Keyboard Shortcuts Pop Up
As you can see in the image, there are no shortcuts set for extensions. Now, you can start assigning shortcuts for each extension, shown there.

Step Four

For assigning Google Chrome shortcuts for each extension, you have to click on the corresponding filed of that section. Once you have clicked, the background of the field will turn red along with one message ‘Type a shortcut’, just like in following image.

Typing Shortcut Extension Manager

Step Five

Now, you have to enter the shortcut, by pressing which you want to open the extension later. For instance, we have assigned the shortcut ‘Ctrl+Shift+W’ for WebRank SEO extension.


Type Shortcut Key Extension

However, you should try to not to give the in-built shortcuts of Google Chrome (like Ctrl+T, Ctrl+W) in those sections in order to avoid the clash. Once you have given all the details correctly, you may click on ‘OK’ button, which will close the pop-up window.

Yes! You have successfully assigned Google Chrome shortcuts for your favourite extensions.

Google Chrome Shortcuts for Various Browser Actions

Even though the former method can help you in activating extensions instantly, Google Chrome does not have an option for controlling browser actions. Therefore, I have to make use of an extension for doing the job neatly. You just have to keep track on following steps to assign Google chrome shortcuts for browser actions.

Step One

First, as I said earlier, you have to install one extension in your Google Chrome browser. You can download this FREE extension, Shortcut Manager, from Chrome Web Store.

Shortcut Manager Extension Installation Step One

Step Two

After installation, taking not more than some seconds, you can see a button, like shown below, near to the address bar of Chrome.


Shortcut Manager Extension Installed

When you click on it, you can see a message like shown below. From the dialogue box, select option ‘See all settings / Add new shortcuts’, which will lead you to another page, the options page of the extension.

Step Three

The options dashboard of Shortcut manager will be like in the following image, consisting of various sections. From the right top section, click on ‘Add a new shortcut’

Shortcut Manager Extension Installed Add New Shortcut


On the right section, you can see multiple columns with different labels. On the first column, named Shortcut key’ you have to type the shortcut. For doing that, click on filed and enter the shortcut keys combination. As you cannot use the backspace for correcting short key, you will have to hit the Clear button for erasing the shortcut key you have entered. In case, if you click the backspace button, it will be also included in the shortcut combination.
Shortcut Manager Save Shortcut

Step Four

In the below section, you can see a field named Action, where you have to define the browser action according to your desire. There are two options available in this section.

1. Browser Action

Here, you have a list of browser actions to choose from. List includes opening new tab, opening tab in new window, moving tabs, webpage navigation, scrolling, screen capture, navigate to downloads, open nth tab, take screenshots etc. In case if you have selected option to open favourite URL, you should give the URL next to the field.

Shortcut Key Working Extension Browser Actions

2. Execute JavaScript

You can assign one shortcut for executing a specific JavaScript. You have to select the latter option and then give the JavaScript file URL or the script itself in corresponding fields.
Shortcut Key Working Extension Enter Shortcut Key

Step Five

You have an option for restraining effects of specific Google Chrome shortcuts in some sites, even though all pages will have effect of shortcuts according to the default setting. If you want to restrict so, you should give URL’s in the section called ‘URL Patterns’

URL Patterns Shortcut Manager

Final Step

If you have given all things correct and accordingly, you can now go back to the top section of page and click ‘Save’. After the re-launching of Google Chrome, the extension will be working fine as usual.

Shortcut Manager Save Shortcut


In addition, you have options for restricting or disabling some Google Chrome shortcuts in sometime. You shall go to the options page, select the corresponding shortcut from list and hit ‘Disable’ to remove its effect from Google Chrome immediately.

Conclusion

Here, I have shown you some options for assigning custom Google Chrome shortcuts for browser actions as well as for launching extensions. Hope both of these methods will be useful for your quicker techy life. Do you know any other methods for assigning Google Chrome shortcuts? Do let us know via comments.

Wednesday, June 12, 2013

Facebook App Pipe: The simplest way to send files upto 1GB to Friends


Facebook launched, the new app “Pipe” this week which allows Facebook users to share files up to 1 GB in size through a simple drag and drop interface.


            Pipe seems to blend the best of two worlds that dominate Internet traffic: bit torrents and social networking. In an infographic published in March, Intel decoded “what happens in an Internet minute” in which it revealed that in a minute, the Internet transferred close to 639,800 GB of IP data across the globe.

            And as for data security, files transferred via Pipe never pass through Facebook servers, instead travelling directly between the connected users with the help of unspecified Adobe technology.

            The peer-to-peer file-sharing application will work with any type of file and will deliver in real-time if the friend is online. If the friend is offline, it will place the files securely in a locker and deliver it when the recipient logs in. Users need to register for the App at www.facebook.com/pipe

So how does it work? Let’s take a look.
First install the Pipe app on Facebook.
pipe1
Next select a friend to share a file with. Notice how it says whether they are “online” or “locker.” Files sent to offline friends will be stored in a digital locker for later retrieval (up to 5 days), and there’s no limit to the number of lockers you can create.
pipe2
Once you’ve chosen a recipient, select the tab to the right which is “locker” since I’m sending a file to an offline friend.
pipe3
Next choose a file and how long you want to make it available – up to 5 days.
pipe4
Once you select “Send to locker” you’ll need to notify the recipient. Recipients don’t have to have Pipe already installed to be notified they have a file waiting, but will obviously need to install to download.
pipe5
Now let’s take a look at what things look like as a recipient.
When you view the Pipe App page you’ll notice there’s a green light lit up in the “locker” tab signalling you have a file or files in your locker waiting to be downloaded.
pipe6
Click the locker tab and you’ll see what you’ve been sent.
pipe7
Click download to grab the file.
pipe8
Now you can share TV shows, movies, or entire albums with Facebook friends without having to hassle with third party sites like Dropbox, for example, that many don’t have accounts with.
Source: Zeropaid

Sunday, June 17, 2012

Why Library Catalogues are not as user-friendly as Search Engines?


Traditional library card catalogues are data-centered ‘handicrafts’ with lots of rigid rules controlling their access and descriptions and hence naturally very much under-used. Since the legacy is continued in modern Online Public Access Catalogues(OPACs) as early OPACs functioned like digital version of card catalogs, end-users also continued to admire library card catalogs and OPACs as ‘handicrafts’ than understand and use them extensively. Whatever limited use made of them is more for searching known-items and/or as adjuncts to library circulation system than as aninformation retrieval tool. Interestingly, many studies have reported that large majority of users prefer to browsing books on the shelves of libraries than browsing library catalogues.


Search Engines intuitively captured the imagination of end-users with many simple and easy to understand features in information discovery and access. User-centric design, self-service, seamlessness, natural language search, fuzzy search, autosuggestion of search terms, spell-check, auto-plurals, auto-word truncation, showing similar items/pages, relevance ranking, popularity tracking, interaction and feedback, provision for varieties of filtering and browsing, etc. are the features users got acquainted from Search Engines. They never expected users to undergo information literacy trainings and not even to have a search strategy or prepare a complexsearch query, but allowed users to enter whatever natural language words come to their mind in a search box with a ‘search’ or ‘go’ button adjacent to it to click and execute without the burden of knowing field tags, Boolean operators or data structure and so on. As a matter of fact, unlike OPACs, by default they did not restrict the search terms to select fields even though that is an option available and this feature greatly increased the relevance of search results. 


Search Engines went to the extent of automatically deciding, as soon as two or more keywords are entered in the search box, either to execute as a phrase search or Boolean ‘AND’ search. Some clever Search Engines execute both in sequence, i.e., first as a phrase search and then as Boolean AND search if the resulting hits are below certain pre-specified number .Once the search results appeared, Search Engines effectively capture the attention of users with relevance ranked presentation, option to change the criteria for ranking like ‘latest first’ (i.e., by date of publication). The display of results by Search Engines is more convenient and comfortable than that from OPACs. Search Engines guide users, in a simple way, not only to modify the search and re-execute with the search box and keywords intact but also enable them to narrow down the search result through various filtering options like subject, author, format, date, language, etc. They also liberally allow users to play with result pages and items by moving back and forth and marking and demarking, downloading, e-mailing, sharing, exporting and processing and doing many more things. In addition, users can access and collate similar records with ‘more like this’ feature for a given author or subjects One welcome development in the recent past is that library OPACs are trying to imitate Search Engines and introduce external links to images, full text, TOC, summaries, author information and reviews of retrieved documents. Classification scheme, cataloging code and controlled vocabulary (thesaurus) are the three ‘sacred tools’ which pre-occupied librarians more than anything else over acentury. But Librarians did not bother to check the acceptance of these tools by end users. Present day Search Engines do have thesauri and taxonomies in the backand help users to map their natural language keywords so that end users are immensely benefited but without taxing them to know what is happening (or how it is happening) in the back. 

Some of the rigid cataloging rules, the process of delineating metadata elements as access, descriptive and administrative data elements, are no more relevant on Web. As such, AACR, MARC and otherstandards have appeared more as limitations from user perspective than a user-friendly service. On the other hand, Search Engines have effectively re-purposed these data elements to add value to service and grown with the changed and expected user behaviour. Library catalogs are also changing, but slowly. For example, the extent of data mining done by Search Engines cannot be compared with Circulation and OPAC modules of any library management software.


In a nutshell, rule-based data-centric design of OPACs turned out to be Librarian-friendly; where as user-centric design of Search Engines are immensely user-friendly. OPACs are no match to Search Engines as for as user-empowerment and minimal consumption-skill requirements are concerned. Of late, Federated Search Engines, in their effort to provide one-stop digital service to users, face challenges in integrating diverse OPACs and different sets of databases within the same OPAC. It is heartening to note that the new J-Gate 2 has many features of a powerful Search Engine and is forging ahead to enhance it soon with even Federated Search Engine features to search in one go all your digital resources including OPAC.

Saturday, May 12, 2012

How Google Search Engine Works


First of all it's important to recognize how Google works. Essentially Google has a huge database that it refers to and which it builds automatically with the help of spiders and robots. These spiders are PHP scripts (programs running on the Google server) which surf the web as we do by following links from one page to another. When they find a page, they will then attempt to categorize it by looking for words that are repeated often (or just a couple of times) and by looking at what terms are associated with the page on other sites (in the links for instance). The order is dictated by which site is the most relevant, as well as which seems to be the best quality based on external references etc, and you will then be given a list based on these factors.


In short then Google looks for matches in your text as well as similar themes on the page. It doesn't (yet) understand what you are asking it and so you shouldn't phrase your query as a question. Searching 'How do I go about fixing my PC?' isn't going to be very useful.

The other reason this isn't going to be very useful is that the language is too chatty (meaning that it will occur on fewer sites a that's not the way everyone speaks) and because it's too general meaning the results won't necessarily help you with your specific computer problem.

What you need to do then is to think of the short snippets of code that are likely to appear on a relevant page and then search for that. So in other words if your monitor won't turn on you should type in 'monitor won't turn on' or 'monitor not turning on' which is likely to match a lot of discussions on forums as well as a lot of other pages.

Better yet for something like that is to search for any specific error codes if they come up, as these will be reprinted by people on forums etc who are asking for advice.


Understanding the SERPs

'SERPs' are the pages that come up when you do a search – 'Search Engine Results Pages'. These include your results as well as some other things. The top few listings for instance will be adverts and these will have a very feint yellowish background behind them – look out for this to identify the ads.

Meanwhile you will see a little listing underneath each result. This snippet of text comes right from the page and this is your best tool for deciding whether that page is providing the right information before you go ahead and click it. Be discerning here and you can save yourself a lot of time.

James Delurno's work with a registry cleaner company has taught him about how badly people are using Google to find their software. He mostly writes about technology and computer maintenance topics but decided to write this one about using Google effectively.

Tuesday, December 13, 2011

Schemer – Google’s New Creation to Search for Activities!

Google has recently launched Schemer, a new service which allows users to add and discover activities based on their location. For instance if I want to learn how to play a guitar then I can create a scheme on my schemer profile about it. My circle of friends from Google+ and services tied to the site can recommend me a guitar shop or a class, where I could learn how to play it. My friends and others (if the activity is publicly shared) can even comment on my scheme with helpful tips.


Once someone signs up with Schemer, that user can also view a host of activities planned by their friends on Google+. You might be able to tick off things you have done among them.

Local and Social


I guess the idea behind Schemer is to help people discover new activities they want to do. For instance if I was visiting a particular city, I might be served up city specific activities which I could find interesting. Schemer is also neatly wrapped with Google+, adding another reason to get on Google’s social network.

Google might also be trying to create something like Foursquare, which is also a location based social network. With Schemer, Google might also be able to aggregate local data for its search results, which it is not exactly really good at currently. At some stage we can probably expect Schemer to be integrated with Google+ profiles and relevant Mobile apps.

Facebook has recently bought Gowalla, another location-based social network. That would make it a competitor to Google’s Schemer somewhere down the line.
Currently Schemer is in beta stage on invite only basis. To get into the queue visit their website and add your email id for getting an invite.

Thursday, November 24, 2011

Google Kills many products including Google Wave and Knol


Google has announced that it in the process of shutting a number of products including Google Wave and Knol.

Find below the list products/services which are going to be closed by Google.

Ø  Google Bookmarks Lists
Ø  Google Friend Connect
Ø  Google Gears
Ø  Google Search Timeline
Ø  Google Wave
Ø  Knol


 Google Bookmarks Lists is the experimental feature for sharing bookmarks and collaborating with friends. It will be closed on December 19, 2011.
Google Gears will be stopped on December 1, 2011. Instead of Google Gear, Google is going to focus on HTML5 for implementing offline browsing capabilities.


Google Wave   will be turned off completely on April 3, 2012. Wave users can export the individual wave to pdf files.


Google Friend Connect (GFC) allows webmasters to add social features to their sites by embedding a few snippets of code. It will be retired on March 1, 2012. Google recommends using Google+ badge instead of this retiring service.


 Knol will work as usual until April 30, 2012, and the knol authors can download  their knols to a file and/or migrate them to WordPress.com


 . 

Google recommends the Knol users to use
 Annotum.org, which is powered by WordPress and was built in collaboration with Solvitor and Crowd Favorite for moving the knol content.


We have lot of
 knols and Knol Collections including a knol about Anil Mishra  which is getting around 200 page views every week without doing any promotion.


Thursday, October 13, 2011

How does Google work?


Google's Secret Formula

In the past 12 months, Google doubled its staff, tinkered with its search engine to speed up results, and now answers more queries than Microsoft and Yahoo combined. But there’s one query we had to answer ourselves: How does Google work?

Blame spell-check. Ten years ago this September, so the story goes, some Stanford grad students were helping Larry Page choose a name for his search engine. “Googolplex,” said Sean ­Anderson. (They’d already sensed how big this could become.) “Googol,” Page replied. Anderson, checking to see if the name was taken, typed g-o-o-g-l-e into his browser and made the most famous spelling mistake since p-o-t-a-t-o-e. Page registered the name within hours, and today, Google isn’t a typo, it’s a verb, one with a market cap of about $160 billion. Here, then, is a guide to what happens during a typical Google search—now, of course, with automatic spell-check.

1. Query Box: It all starts with somebody typing in a request for information about the safest dog food, what time the D.M.V. closes, or what the prime rate is in China.


2. Domain-Name Servers: “Hello, this is your operator . . . ” The software for Google’s domain-name servers runs on computers in leased or company-owned data centers all over the world, including one in the old Port Authority headquarters in Manhattan. Their sole purpose is to shepherd searches into one of Google’s clusters as efficiently as possible, taking into account which clusters are nearest to the searcher and which are least busy at that instant.


3. The Cluster: The request continues into one of at least 200 clusters, which sit in Google-owned data centers worldwide.


4. Google Web Server: This program splits a query among hundreds or thousands of machines so that they can all work on it at the same time. It’s the difference between doing your grocery shopping all by yourself and having 100 people simultaneously find one item and toss it into your cart.


5. Index Server: Everything Google knows is stored in a massive database. But rather than waiting for one computer to sift through those gigabytes of data, Google has hundreds of computers scan its “card catalog” at the same time to find every relevant entry. Popular searches are cached—held in memory—for a few hours rather than run all over again. That means you, Britney.


6. Document Server: After the index server compiles its results, the document server pulls all the relevant documents—the links and snippets of text from its massive database. How does Google search the Web so quickly? It doesn’t. It keeps three copies of all the information from the internet that it has indexed in its own document servers, and all those data have already been prepped and sorted.

7. Spelling Server: Google doesn’t read words; it looks for patterns of characters, be they in English or Sanskrit. If it sees your requested pattern a thousand times but finds a million hits for a similar pattern that’s off by one character, it connects the dots and politely suggests what you probably meant, even while it provides you the results, if any, for your fat-fingered query for “hwedge funds.”


8. Ad Server: Each query is simultaneously run through an ad database, and matches are fed to the Web server so that they’re placed on the results page. The ad team is in a race with the search team. Google vows to deliver all searches as quickly as possible; if ad results take longer to pull up than search results, they won’t make it onto the page—and Google won’t make money on that search.


9. Page Builder: The Google Web server collects the results of the thousands of operations it runs for a query, organizes all the data, and draws Google’s cunningly simple results page on your browser window, all in less time than it took to read this sentence.


10. Results Displayed: Often in 0.25 seconds or less.


Cluster Control

Google’s genius lies in its networking software, which helps thousands of cheap computers in a cluster act like one huge hard drive. Those inexpensive computers allow Google to replace parts ­without stopping the whole show: If a computer drops dead, there are at least two others ready to take its place while an engineer swaps out the busted machine.

Power Power

Just about the only thing limiting Google’s performance is how much electricity the company can buy. One of its newest data centers (code name: Project 02) is near the Columbia River in The Dalles, Oregon, which has access to 1.8 gigawatts of cheap hydroelectric power; not coincidentally, this is where major internet hookups from Asia connect to U.S. networks. The byte factory has two computing centers, each the size of a football field.

Petabytes

Based on the few numbers Google releases, experts guess that at least 20 petabytes of data are stored on its servers. But Googleytes are ­famous for understatement; Wired says Google may have 200 petabytes of capacity. So how much is that? If your iPod were just 1 petabyte (one million gigabytes), you’d have about 200 million songs to shuffle. And if you started downloading a petabyte over your high-speed internet connection, your great-great-great-great-grandchild might still be around when the last few bytes get transferred, in 2514.

Page Rank

Google decides how reliable a site is—and thus how important the site’s content will be when Google forms a list of search results—by considering more than 200 factors as it analyzes content. But the secret sauce is Google’s patented formula for following and scoring every link on a page to learn how different sites connect, which means a site is deemed reliable based largely on the quality of the sites that link to it.

Googlebots

Google deploys programs called spiders to build its copies of the internet. On popular sites, Googlebots may follow every link several times an hour. As they scour the pages, the spiders save every bit of text or code. The raw data are pulled back into the cluster, run through the mill, and scheduled to incrementally replace the older data already on the index and doc servers, ensuring that results are fresh, never frozen.

Wednesday, October 5, 2011

Useful Google Plus Tips and Tricks | Google+ Tips and Tutorials


Google+
This post contains some useful Google Plus tips and tricks or some useful Google+ Tutorials. Google Plus is now become the most growing social network and gains huge users in the short period of time while in the beta mode. A truth about this blog is that we have included some articles about facebook tips and tricks and found targeted visitors from major search engines but after lanuch Google Plus beta mode we have included Google Plus tips and tricks in this blog and look the major effect that my visitors from search engines increased as a rocket speed so this live experience shows users are searching more and more about Google Plus tips and tutorials in these days. 
The main thing on social networking sites is the privacy of their users which is easier in Google Plus to set what you want to show or hide of your data to the web. Facebook did many changes in their privacy setting and launch video chat with skype after launch Google Plus beta mode because if facebook don't take any action then for sure Google Plus reach to the top level with easiest ways but there is no doubt facebook is struggling to stand against Google Plus. By the way check out some most useful Google Plus tips and tricks listed below.


1.   Basic Definitions of Google Plus Features as Circles, Hangout, Sparks

Before starting about Google Plus Tutorials lets start with what is Google Plus Project and some basic definitions of its features. Just follow

What Is Google+?

Google+ is a tool you can use to organize your online contacts. You can upload your pictures and videos to share with friends, join in on a group video chat to plan your next outing, or just hang out!


  • +Circles
Enable you to organize contacts into groups for sharing across various Google products and services. Although other users can view the list of people in your collection of circles, they cannot view the names of those circles. Organization is done through a drag-and-drop interface.


To understand Google Plus and Circles better, go to the Settings Gear and select Profile and Privacy. Look for "See how your profile looks to other users." Type in a user name from different circles and click Preview to see what your profile looks like from the specified user.
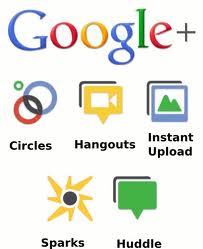


  • +Sparks

A front-end to Google Search, enabling users to identify topics they might be interested in sharing with others. “Featured interests” Sparks are also available, based on topics others globally are finding interesting.

Sparks is a great way to find information to help in your professional development towards building your e-capability, all information is current and reliable.

  • +Hangouts

Used to facilitate group video chat (with a maximum of 10 people participating in a single Hangout at any point of time). However, anyone on the web could potentially join the 'Hangout' if they happen to possess the unique URL of the Hangout.


  • +Huddle

Huddle is a a group messaging feature available within the Google+ mobile app. Rather than sending text messages to each person in a circle the user sends Huddle messages to the group. This can be advantageous when trying to setup where and when to go out.

  • Google+ Mobile


Accessing Google+ on one’s Mobile Phone or Device (Currently Android and Web Only)

Download the Google+ mobile application from the Android Market. Once you launch the application it will ask which account you wish to sign in with, select the account.


  • Enable Push Notifications

Google+ mobile app -- Launch Google+ on your phone, press the menu button and go to Settings. Enable or Disable notification/vibration/ringtone for Google+ and Huddle notifications.

Google+ (plus.google.com) -- Click the ‘Options’ cog in the top right hand corner of the screen and select ‘Google+ Settings’. Under ‘Set delivery preferences’, add your mobile number and choose Push Notifications or SMS Notifications. Then in the ‘Receive Notifications’ section, choose which notifications you would like to receive by selecting the checkbox in the phone column for each item.


Getting Started with Google+

Tips

Google+ can be accessed from http://google.com/+ or http://plus.google.com or http://google.com/plus or, for mobile device, from http://m.google.com/plus.

To share Google+ posts click the “Time link” button and use the Google Shortener Extension for Chrome browser and share posts to Blogger, Tumblr, Facebook and others.


Creative ways to use Circles


Create an “*Inbox” circle and include the people you’d like to see every post from. The friends, family, and acquaintances circles are on top by default.

Create a "Read later" circle and include no other person (Google+ calls it an empty circle). When you see a post you want to read later, share it only with the "Read later" circle. Then when you have some time, open that circle and read through (and delete) the saved posts.

Similarly, create an (empty) "Drafts" circle. When you have an idea for a post, but no time to write it, draft a rough version and share it to the "Drafts" circle. Edit the draft by using "Edit this post" from the drop down menu. Then, when the post is complete, copy it to a new post that you can then share to your circles and delete the draft post.

Yet again, create a similar (empty) circle called “Bookmarks” so you can go back and find that tidbit of information to read and use again and again.

If you would like to mute future notifications on a particular post you can do so by opening notifications, then opening the particular notification you wish to mute. Look at the bottom right hand corner of the notifications box. There will be an option to mute that notification.


Formatting

Google+ uses the follow character operations to perform italicizing, bolding, or striking through text:


_ italic text _ ➜ italic text
* bold text * ➜ bold text
- strikethrough text - ➜ strikethrough text
_*italic bold text*_ ➜ italic bold text


Formatting symbols only work when the formatted string is encapsulated by spaces, therefore surrounding the symbols by parentheses or brackets escapes the formatting.


[_ italic text _] ➜ [italic text]
** bold text ** ➜ *bold text*
_()(*- strikethrough text -*)()_ ➜ ()(*-strikethrough text-*)()
foo_*italic bold text*_bar ➜ foo_*italic bold text*_bar
**cough** ➜ *cough*


Shortcuts


Note: These shortcuts apply to the desktop version of Google+ only.

@Anil Mishra or +Anil Mishra ➜  (press @ or + to link to a person in a post or comment) but they must be a google plus member for this to work otherwise the hyperlink of their name just turns into plain text.

After you post, click the little drop-down arrow (▽) in the upper right of the post to disable comments or disable re-sharing (i.e., for things you don't want to spread beyond your specified audience).

Press “q” to go directly to the chat box

Press , then after writing a comment on a post to quickly submit it. (faster than clicking the Post Comment button every time)

Press twice and then to cancel writing a comment.

Press space to drop down a page. (Applies to all web pages)

Press +space to move up a page. (Applies to all web pages)

If you want to post directly to specific friends, just type the first letter of their name, a drop-down list will appear, keep typing until you see their name, then select the name and click to send message or begin chat. Alternative quick step, if necessary, click to remove existing “addressees” (i.e. Public, Circles, etc) so that the post is addressed to no one. The in the message area using the + or @ technique described above, start typing their name until you see it, select it, and it will then be included in the message as well as the addressees.

While moving through posts using ‘j’ (next post) and ‘k’ (previous post), you can start     a comment by pressing .

Use the mouse scroll wheel to navigate through photo slideshows


Privacy

A core element of Google+ is its privacy features, which have been integrated deeply into the product. Google+ gives users extensive control over these features.

Click edit in your profile to change which circles can view what personal details. Your name, gender, and profile picture have to be public, everything else can be restricted. You can also opt out of appearing in the search results here.

If you would like to send a message to another user, just put their name into the destination field of your posting. If the recipient is not a user of Google+, enter their email address. To save typing the email address every time, you can add them as a contact on the circles page.

If you want the permanent link to a post, click on its timestamp to see the single post. You can copy the URL from your browser to share the permalink (alternatively, you can select “Link to this post” from the drop-down menu at the top left of the post)

You can link directly to your profile using http://profiles.google.com/.

There are also non-official shorteners that use the profile number you can find when viewing your profile. (For example go to http://gplus.to/)

To understand Google Plus and Circles better, go to the settings gear to Settings -> Profile and Privacy. Look for "See how your profile looks to other users." Type in a user name from different circles and you will be able to see how your info is shared according to those circles.

There is a shortcut for this under the EDIT PROFILE button on a user’s profile page. It’s a greyed-out “View profile as....” box. Click on each section to see how each person or circle will view each area: About, Posts, Photos, Videos, +1s, Buzz


1.   Google+ Tips for Send/Receive Tweets in Google Plus

If you want to twitter integration as sending tweets and showing your twitter updates into your Google Plus account then you can easily integrate your Google Plus account with twitter. you don't need to leave your Google Plus account for sending tweets or showing your updates of your twitter account. Just follow Send/Receive Tweets or Show Twitter Stream in Google Plus.


2.   Google+ Tutorials for send/receive facebook updates in Google Plus

Now after twitter integration you can integrate your facebook account in your Google Plus account. You don't need to leave your Google Plus account if you want to post any update in your facebook or you want to see your facebook stream updates. Just follow Show Facebook Stream and Updates Facebook Wall from Google Plus. 


3.   Google Plus Tips for Bold/Strikethrough and Italic Text

 Different text formatting are always eye catching for your friends and for your customers so get noticed to some words for making it bold/italic or strikethrough. Just follow Make text to Bold/Italic/Strikethrough in Google Plus.


4.   Google Plus Tips and Tricks for Sending Private Messages

Did you find any option for sending private message to your Google Plus friends? No. Ok some tips is required for sending private messages in Google Plus to your friends. If some one send you private message then you will got these messages into your main stream page and the message will be seen only by you. So just follow Sending Private Messages to Friends in Google Plus.


5.   Google Plus Tricks To Get Google Plus Notification Updates on Mobile Phone

Do you want notification if some added you to in circle or if some one write comments on your updates or anything what you check options to getting notification on your mobile phone. Just follow Google Plus Updates Notification on Mobile Phones. 


6.   Google Plus Wall Status Updates By Mobile Phones via SMS

Now if you are an Indian users then you can send Google Plus updates via SMS from your mobile phones and also you can send updates to individual circles. Hope this features will be launch word wide soon! So for Indian users just follow Get Google Plus Updates from Mobile via SMS Text.


7.   Google Plus Tips for Adding Google+ Widget To Blogs

Are you a webmaster? Have you any blog? If your answer is yes, then by adding Google+ widget to your websites or blogs you can increase your Google Plus connections so for adding Google+ widget for your blogs just follow Adding Google+ Widget To Blogs. 


8.   Google+ Tutorials:Sharing your wall updates to directly facebook, Twitter, LinkedIn, Tumblr

You can now share your Google Plus wall updates directly to facebook, twitter, linkedin and tumblr. Your each updates will contain a button of "Share on..." and if you click on then you will see option to share. This is all have done by a chrome extension so you have to use chrome browser if you want this option. Now if you are on chrome browser and want to enable this feature then just follow Share Google Plus Wall Updates To Facebook/Twitter.


9. Downloading Google+ data as friends contact, albums, videos to desktop

If you want to secure your Google Plus data as your albums, your uploaded videos or your friends contact, your stream data and your profile data to your desktop hard drive before being hacked by some one. Just follow Download All Google Plus Data To Desktop Hard Drive.


10.    Google Plus Tips To Move Facebook Album Photos To Google Plus

Have you many photos in your many albums and want all photos in your Google Plus Profile. It is very difficult to save all photos to your desktop and then upload these to your Google Plus Profile. A Chrome Extension is there for easily move your facebook photos to your Google Plus account with some clicks. You have to be on chrome browser if you want to move your facebook albums to Google Plus by just simple clicks. Just follow Move Facebook Photos To Google Plus Account.


These Google Plus Tips and Tricks are regularly updated so get back after some days to this post you will see some more Google Plus Tutorials. If you want to get updates on Google Plus then you can get noticed by bookmark this page,
 Add me in your Circle on Google Plus and you can Be My Fan on Facebook and follow us on Twitter or simply get updates directly to your email address just verify your email address with us for SubscribeMy News Later.

Recommend this

Related Posts Plugin for WordPress, Blogger...
